User Role
As its name suggest, user role is where you assign roles within your company to users. Doing so makes the whole admin and management side of things much easier.
Imagine you have 100 employees and you want to give every one of them access to 20 different functions within the application. That’s 2000 assignments you’d have to do (100 x 20). However, given that we have an ‘Employee’ role to which we can add an unlimited number of employees to, you just 1) assign all 100 to that role, and 2) assign that role to the 20 tasks. For the mathematicians among you, that’s over a 90% saving in assigning people (and this doesn’t take into account people swapping roles, new staff, turnover, adding new tasks, and so on). Roles make your life so much easier.
Within user roles, you can do the following:
Add New Role
To add a new role:
- Click on the Add New Role button and the Add Role form will display:
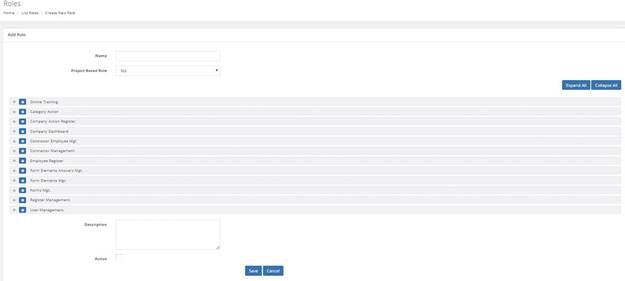
The Add Role form
Here you can add the following to define the role:
- Name – this is the name of the role that you’re creating
- Project Based Role? – here to select whether the role is project based or not.If it is a project role, then this role will be visible within the corresponding product. You will then be able to assign users to the project.
Underneath these fields, you can clearly see the CASSA modules listed, with a + button to expand each individual module.
You can also see the Expand All and Collapse All buttons:
- Clicking on Expand All will expand all modules to show all permissions.
- Clicking on Collapse All will collapse all modules and hide all permissions.
Scrolling to the bottom of the page, we also see:
- Description – here you can enter a description of the role you’re creating
- Active – select whether it’s active or inactive.
- Save – click here to save your role and any changes made.
- Cancel – click here to discard the role and any changes made.
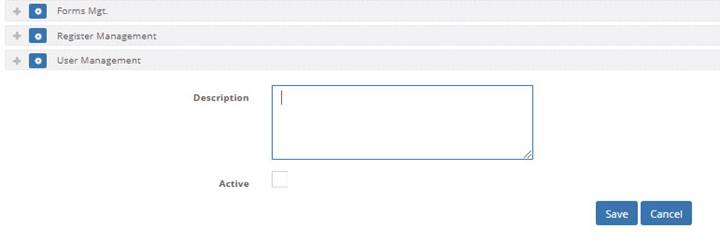
The description field and active/inactive checkbox (deselected by default)
We’ll take a look at the top module, Online Training.
- We could click on the Expand All button to show all permissions, but given the screenshot would be enormous, let’s just click on the + button next to Online Training to expand that single module:
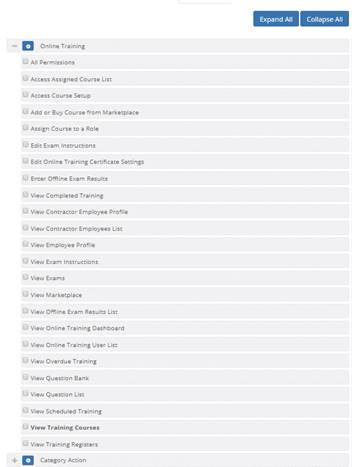
Click on a single + button to expand that section only
-
Here you can see all the permissions that can be assigned to a role. At the top, you can see All Permissions. Clicking on this will, unsurprisingly, select all permissions.
-
If you wish to deselect some of those selected, untick them:
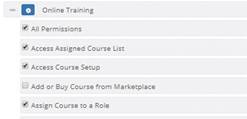
Accept or deselect required options
-
Continue to assign the required permissions to the new role.
-
When complete, click on the Save button to save all changes, close the form, and return to the Role Management grid.
View Role
To view the details of a role, from the Role Management grid:
-
Identify the role whose details you wish to view.
-
In the Actions column, click on the View button and the category and corresponding permissions will display:
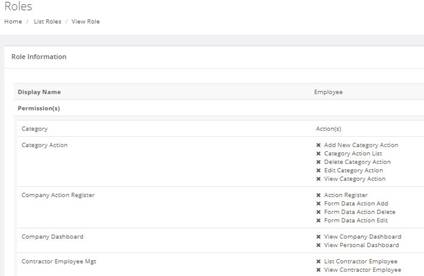
Viewing role permissions
- As this is in View mode, there is no edit functionality available. Click on your browser’s Back button or on the breadcrumbs navigation to return to the Role Management grid.
Edit Role
As mentioned in Default CASSA user roles, built-in roles cannot be edited. However, you have full control over the ones you’ve created.
To edit a user role:
- Using the grid (you can use the search facility if necessary) identify the user you want to edit.
- Click on the Edit button and the user role form will open where you can edit all fields.
- Make your changes and, when you’ve finished, click on the Save button. Your changes will save, the screen will refresh, and you’ll be returned to the Register Management grid.
Delete Role
Here’s a test user I’ve already created:

A test user about to be deleted from the system...
As you can see, you can carry out view, edit, and delete with this user.
- Using the grid (you can use the search facility if necessary) identify the user you want to delete.
- Click on the Delete button and the confirmation dialog will display:

The delete confirmation dialog box. Click on Yes to delete the role.
- Click on Yes and the dialog will close, the screen will refresh, and the role will be deleted from the grid.
Search for a Role
The Search field acts as a filter for whatever part of the CASSA system you’re in, such as assigned courses, registers, forms, etc. To use it:
- Enter a keyword into the field and, as you type, the results will filter accordingly. For example, if you start to enter ‘manager’, as soon as you started typing ‘ma’, you can already see the results you need:

The search functionality
- Click on the action you require, such as View, Edit, Delete, etc., to initiate it. You can also use this filter records for export or print.
The Search Functionality
This search functionality is used throughout the CASSA system and we encourage you to use it to your advantage. However, different actions will become available for different tasks based on user access, permissions, etc.
Export Roles
You can also export the user roles grid in either the csv or the xlsx format
- If you want to export the entire set of records, ensure that no search filter is in place (delete the text from the search field to do this). If a search filter is in place, then only the filtered results will be saved to the downloadable file.
- To export as csv, click on the csv button and the Save As dialog will open to allow you to save the file to your computer
- To export as an Excel spreadsheet, click on the Excel button. Again, the Save As dialog will display and allow you to save the file to your pc.
- You can now open the file on your computer and view it in the normal manner
Print Roles
You can also send the user roles grid, filtered or unfiltered (as before), to a printer:
-
Click on Print and the print window will open.
-
You can now change print settings, such as Destination printer, the number of pages, page orientation, etc. The actual settings all depends on your own printer.
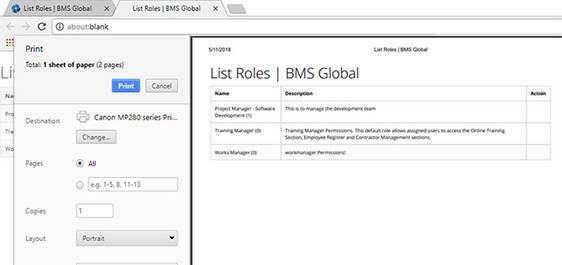
he print preview function. What you see may differ to this (depending on your printer)
- When ready, click on the Print button to send it to your printer.
Updated almost 5 years ago
