Menu Structure
This functionality is only available to Enterprise Users
If your organisation needs a different menu structure to the one that CASSA provides by default, then this is how you create your own:
-
Click on Settings in the main navigation, and then on Register Management to take you to the List Registers tab (or it’s displayed by default in the main Settings page):
-
Click on the Menu Structure tab and you will see all the menu items and permissible actions:

The menu structure management grid
Items and permissible actions include:
- Add New Menu
- View Menu Structure Information
- Assign Register
- Edit Menu Structure
- Delete Menu
- Search for a Menu
- Export Menu
- Print Menu
Add New Menu
To add a new menu:
- Click on the Add New Menu button and the Add Menu Structure form will display:
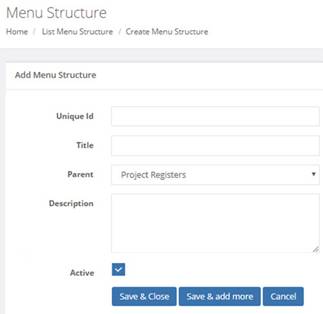
The blank add menu structure form
- Enter the following information:
- Unique ID – this identifies your menu item. We recommend picking a naming convention for your fields and sticking to it (see Naming Conventions).
- Title – this is the name of the menu and is what will appear on the button/link.
- Parent – this is a drop-down list. If this is a top-level menu item, then select Root. If it’s a sub-menu of an existing menu item, then select the required item from the drop-down list:
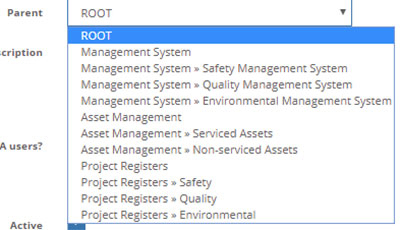
The parent item list
- Description – enter a useful description of the menu item (one that will help you determine what it does when you come back to it in 6-months’ time).
- Active – if you don’t want this menu item to be visible then deselect the Active checkbox to make it inactive.
- Once complete, the form will look similar to this:
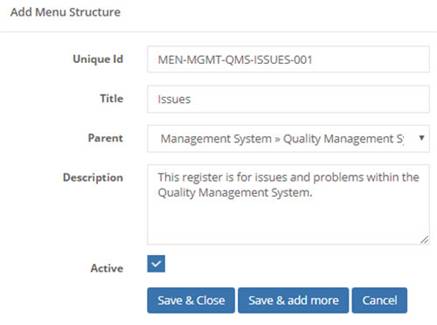
Your completed form will look similar to this
- Your choices now are:
- If you don’t need to add any additional menu items, click on Save and Close and the form will close, returning you to the menu structure grid.
- If you need to add another menu item, such as a child menu item of this parent item, then click on Save and Add More. Your changes will save, and you will remain on the same page.
- If you wish to discard changes and close the form, click on Cancel. You’ll then be returned to the menu structure grid.
View Menu Structure Information
To view the attributes of an already created menu:
- Click on the hyperlinked menu name under the Title column:

The title is hyperlinked for you to click on
- The menu information will display:
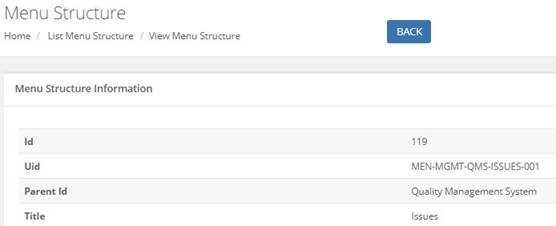
You will notice that there are additional system-generated fields here. However, as you’re in View mode, nothing here can be edited.
- Click on the Back button to return to the Menu Structure grid,
Assign Register
To assign a register:
-
Identify the menu to which you wish to assign the register.
-
Click on the appropriate Assign Register button and the Assign Registers page will display:
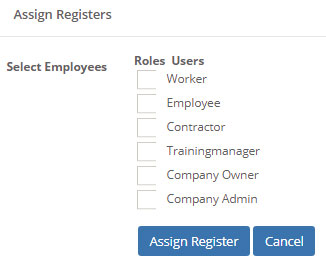
The assign registers page/form
-
Select the appropriate roles or users and then click on the Assign Register button.
-
The form will close, and you will first be notified that the register has been assigned correctly, and then you will be taken to the Email Templates tab where you will see the notification, as shown:

Notification that the register's been assigned
Edit Menu Structure
To edit a menu structure
-
Identify the menu you wish to edit.
-
Click on the appropriate Edit button and the Edit Menu Structure page will display:
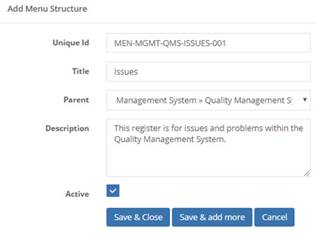
Here you can edit the menu structure
-
This form will already be familiar to you, so make your changes and then click on the action buttons you require: Save & Close, Save & add more, or Cancel.
-
You will then be returned to the Menu Structure grid.
Delete Menu
To delete a menu:
-
Identify the menu you wish to delete.
-
Click on the corresponding Trashcan button and the Delete Confirmation dialog box will display.
-
Click on Yes to delete the menu.
-
The dialog box will close, the screen will refresh, and the menu will have been removed.
Search for a Menu
Now we’ll search for a menu record:
-
Click in the search field and start entering your search term.
-
I will start entering ‘Issues’, as that’s the menu item I created, but as soon as I type ‘is‘ the filter has already isolated the records that I’m looking for, and I can see mine at the top:

The standard search functionality will try and match your entered search term
- Select your record and action from the filtered results.
Export Menu
Also, in that same toolbar, you can export the matrix in either the csv or the xlsx format:
- If you want to export the entire matrix, ensure that no search filter is in place (delete the text from the search field to do this). If a search filter is current, only the filtered results will be saved to the downloadable file.
- To export as csv, click on the csv button and the Save As dialog will open to allow you to save the file to your computer.
- To export as an Excel spreadsheet, click on the Excel button. Again, the Save As dialog will display and allow you to save the file to your pc.
- You can now open the file and view it in the normal manner.
Print Menu
You can also send the matrix, filtered or unfiltered (as before), to the printer:
- Click on Print and the print window will open.
- You can now change the print settings, such as Destination printer, the number of pages, page orientation, etc. The actual settings all depends on your own printer.
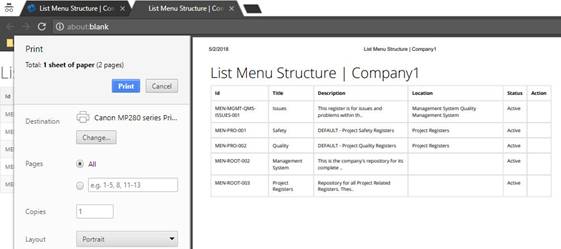
- When ready, click on the Print button. The dialog box will close, and the matrix will be sent to the printer.
Updated almost 5 years ago
