Company Forms
This is where your company forms are stored. To be able to use these forms, they must already have been created in the App Management section of the main web app.
How to Access Company Forms
You access company forms directly from the Home screen on the web app.
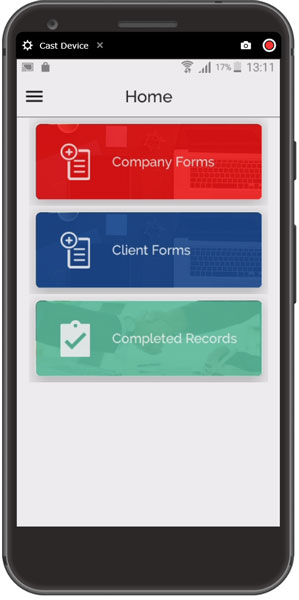
The app home screen
How to Complete a Form
Forms must be created on the web app first
All forms must first be designed and created in the web app. As such, when we talk about creating a new form on the app, it’s creating a record from an existing form.
To complete a form:
- Click on the Company Forms button on the Home Page screen and you’ll be taken to the forms list:
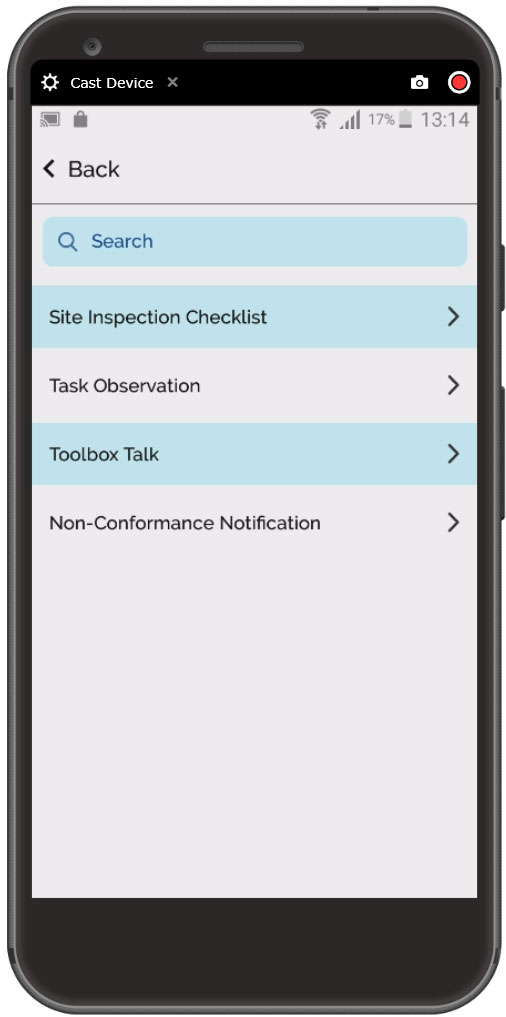
Forms list
Here you can see all the forms that have been created in App Management (in the web app).
- Click on the form you wish to use. For the purposes of this demo, I’ll use a Site Inspection Checklist, The form will open:
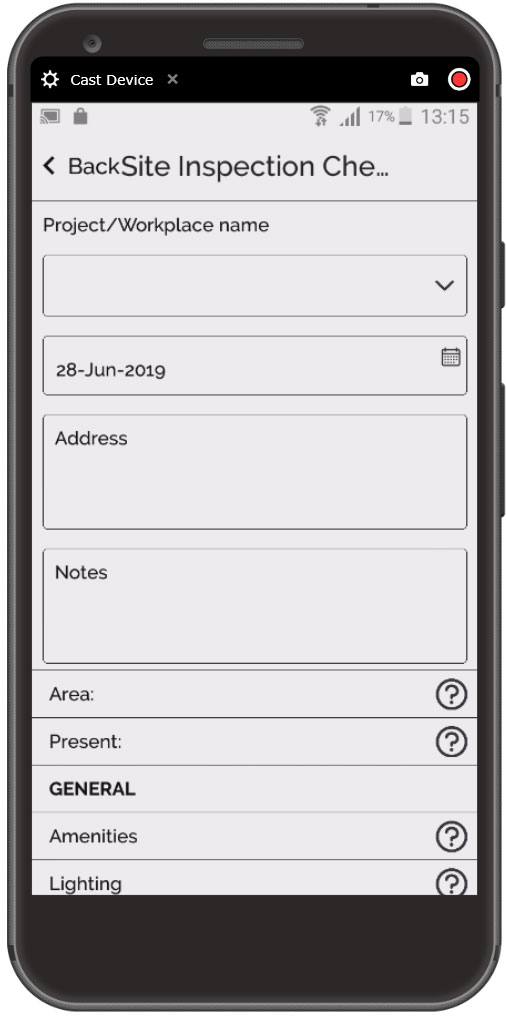
A blank Site Inspection Checklist
Naturally, your forms may be different and the fields that you see will all depend on the type of form you’ve already created and added.
As you can see from the screenshot above, to fill out this particular form, I need to enter the following:
- Project/Workplace name
- Date
- Address
- Notes
- Area
- Present, etc.
If your form has additional fields, then scroll-down to view them.
- I’ll enter my visible fields’ information:
Most fields are text fields, but there's also:
- date field - where you can select a future or a past date
- radio buttons - these only allow a single selection, e.g. Yes/No, Checked/Not Checked/Not Applicable
- multi-select buttons - these allow multiple selections
- Actions-type drop-down lists - this is where you select from a list of items
- Responsible person-type list - where you start typing and the system will match and suggest according to the letters entered.
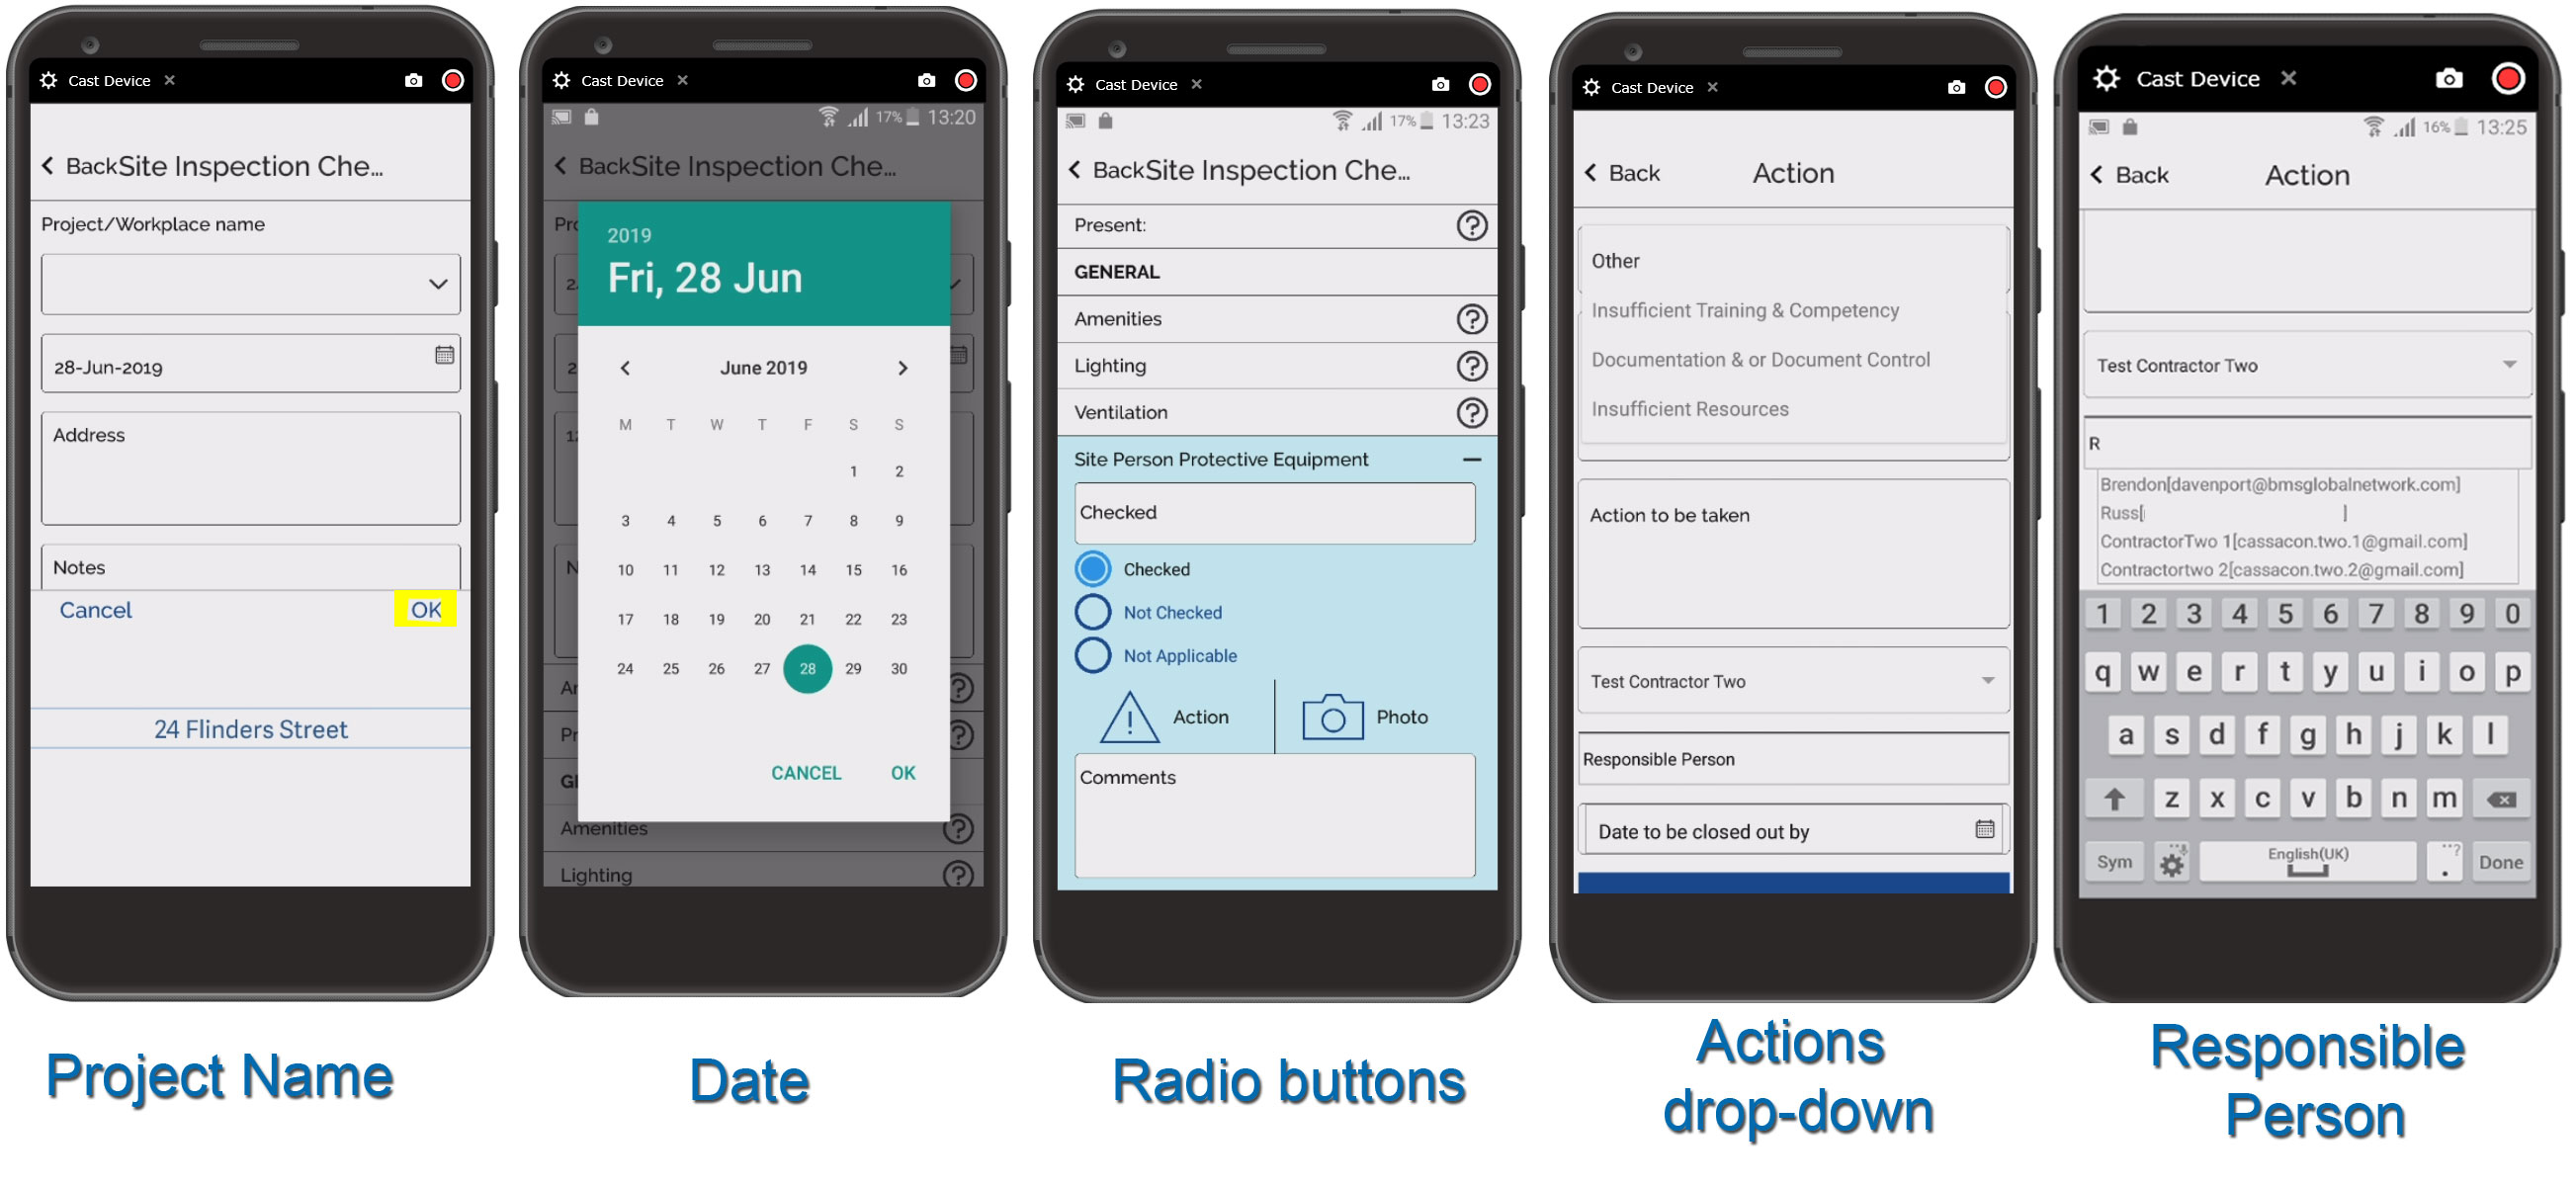
These are the different types of form function you will encounter. They're straightforward enough
I'll enter my visible field information:
- Project/Workplace name
- Date
- Notes, etc.
Then it's time to fill out the rest of the form.
Naturally, the form you need to complete will have it's own specific fields, but should be self-explanatory. If they're not, then consult your supervisor.
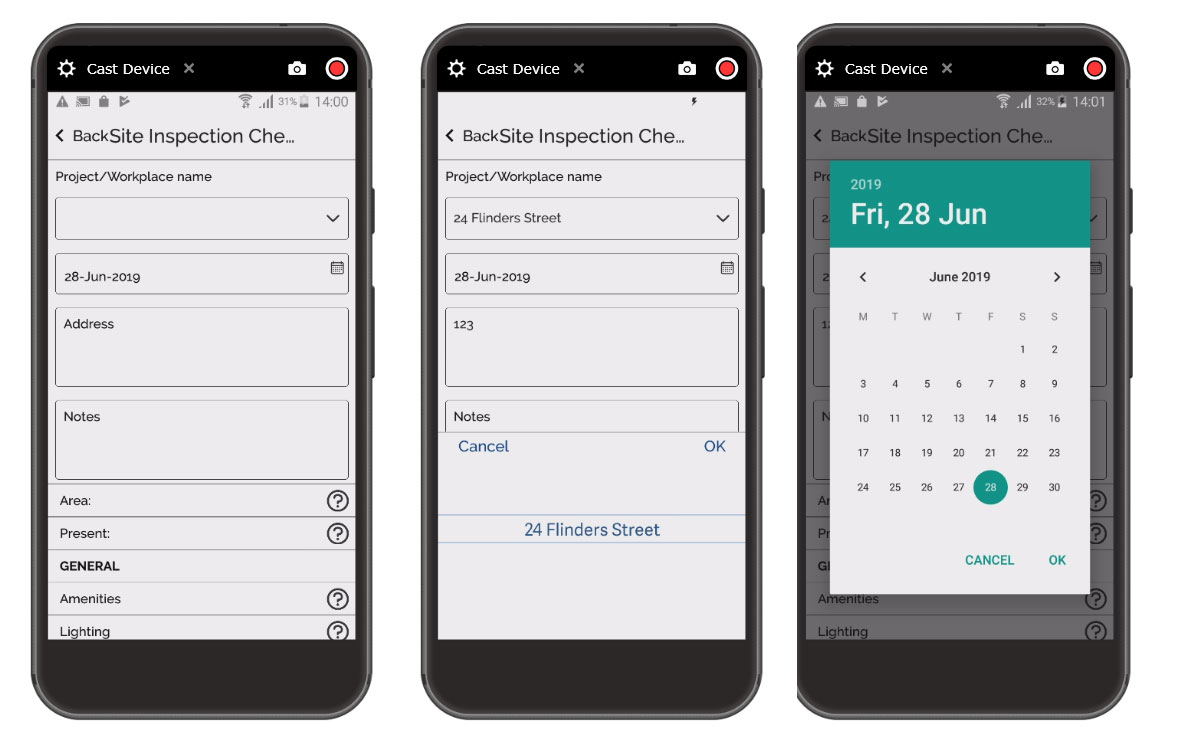
Now we'll look at adding an action.
Add an Action
To add an action:
- Click on the Action hazard triangle and the Action form will display.
- Complete the relevant action fields:
- Action type
- Details of issue
- Action to be taken
- Responsible person
- Date to be closed out by, etc.
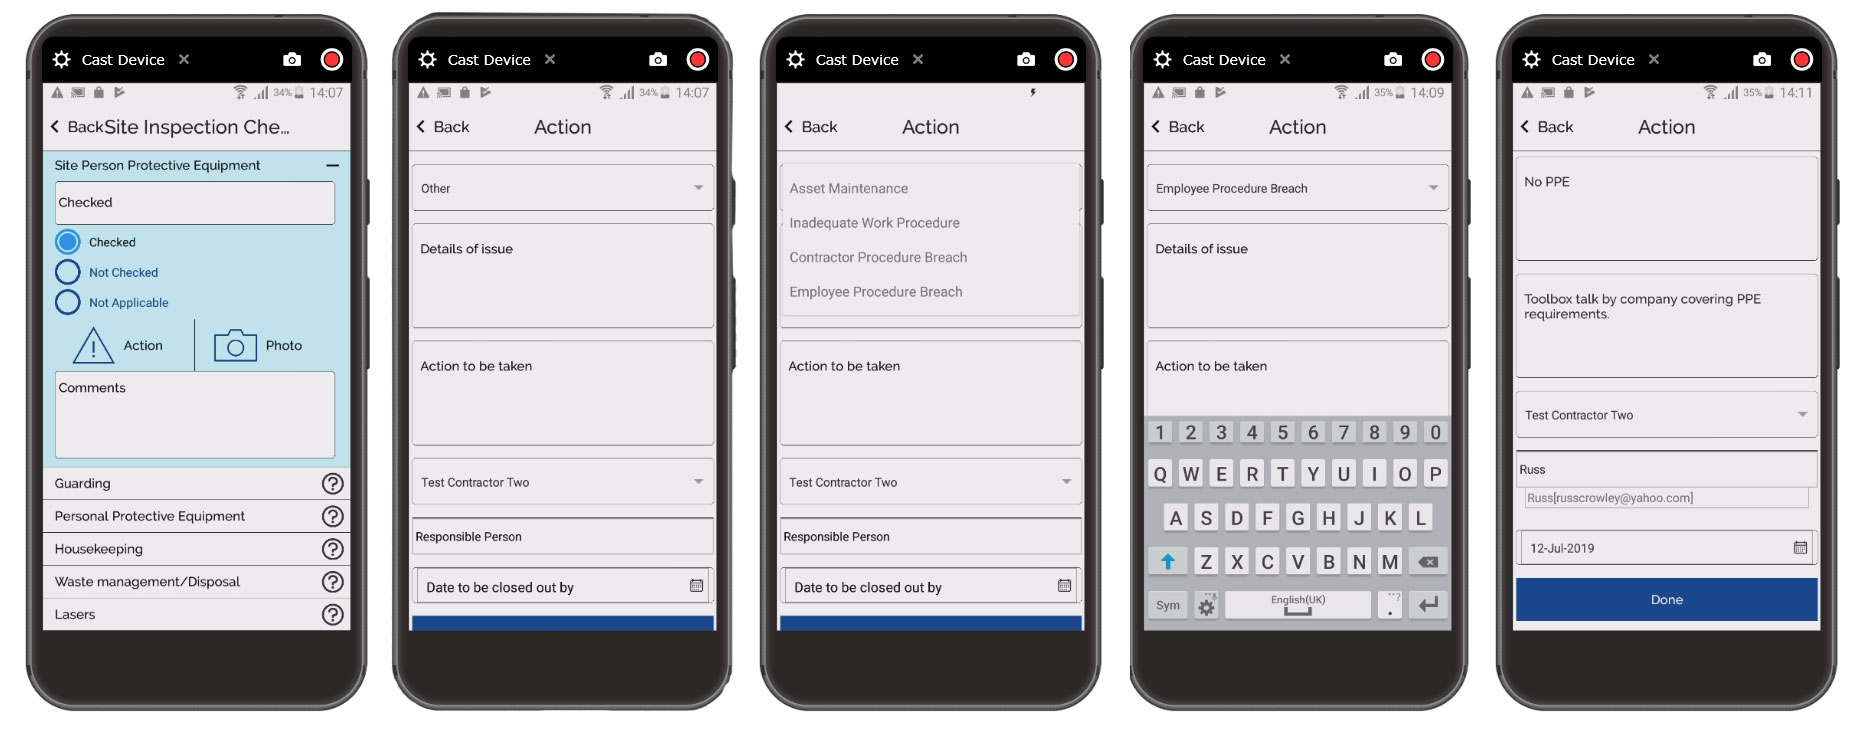
Precise details will depend on your form's design, but usually comprises drop-down lists, text, and date fields
This should all be self-explanatory.
- Click on Other and select from the drop-down list:
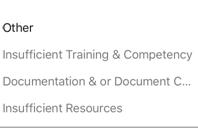
The dropdown will list will be populated with other types of action
- Add Details of the Issue, Action to be taken, and the full name of the Responsible Person; all are text fields.
Note: an email notification will be sent to the assigned responsible person.
- Select the Date to be closed out by from the calendar field.
- Check that all fields are correct and then click on Done to return to the form.
Note: when we export the form, the form will be placed into the selected repository and any actions entered will then be entered into the Project Action Register and the Company Action Register, and the Responsible Person will receive an email notification plus it'll also show up in their action register.
The other type of form field you will regularly use is the Photo field:
Add a Photo
To add a photograph to your form, click on the Camera icon, labelled Photo
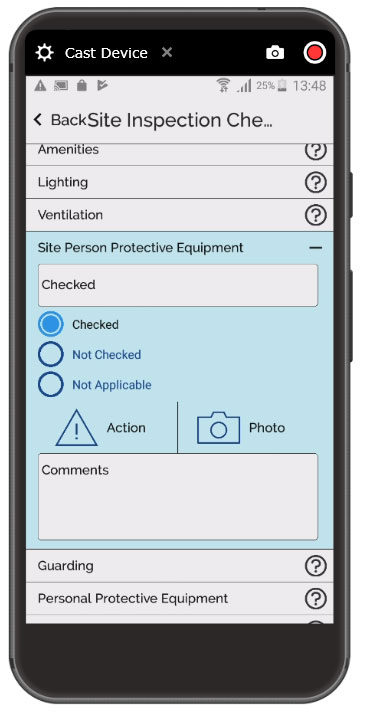
Click on the camera/photo button
You can now add a photo. The sequence is shown in the image, below:
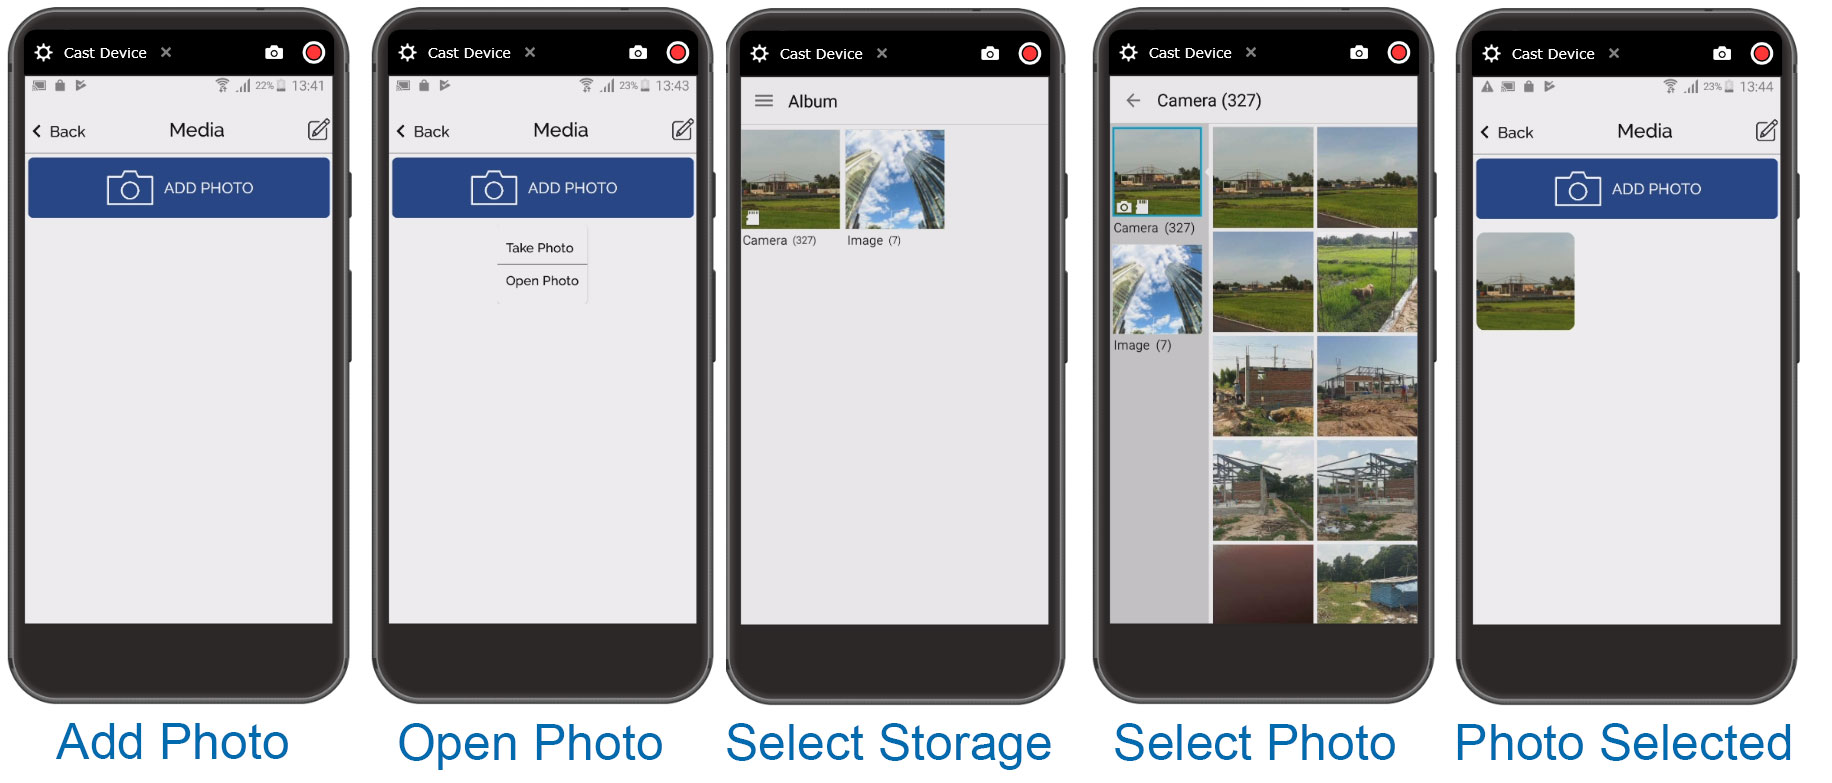
- Click on Add Photo button and then either on Take Photo or on Open Photo.
Note: your device's functionality may differ, but I'm sure you're familiar with its photo-taking capability. If you're not, please read the device's manual and brush up on how to use it.
For the purposes of this example, we'll use Open Photo.
-
On my Android device, as shown above, I now get to select the storage/album media screen, and then the photo.
-
Once a photo is selected, I can then repeat and add as many photographs as required.
Add Markup to the Photo
You can also add markup to the photo to bring attention to certain areas.
i. Tap on the photo to select it.
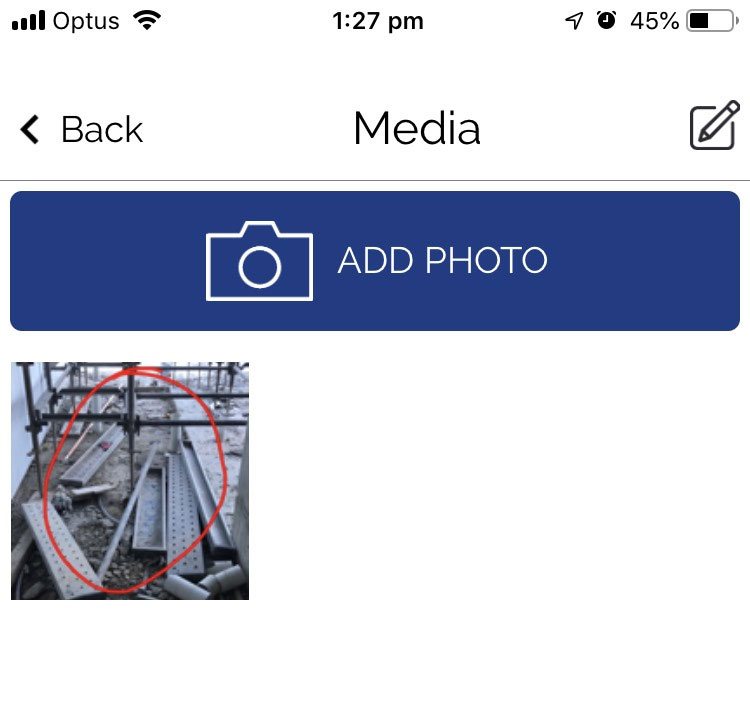
ii. Add markup to the image using the app's functionality, as required,
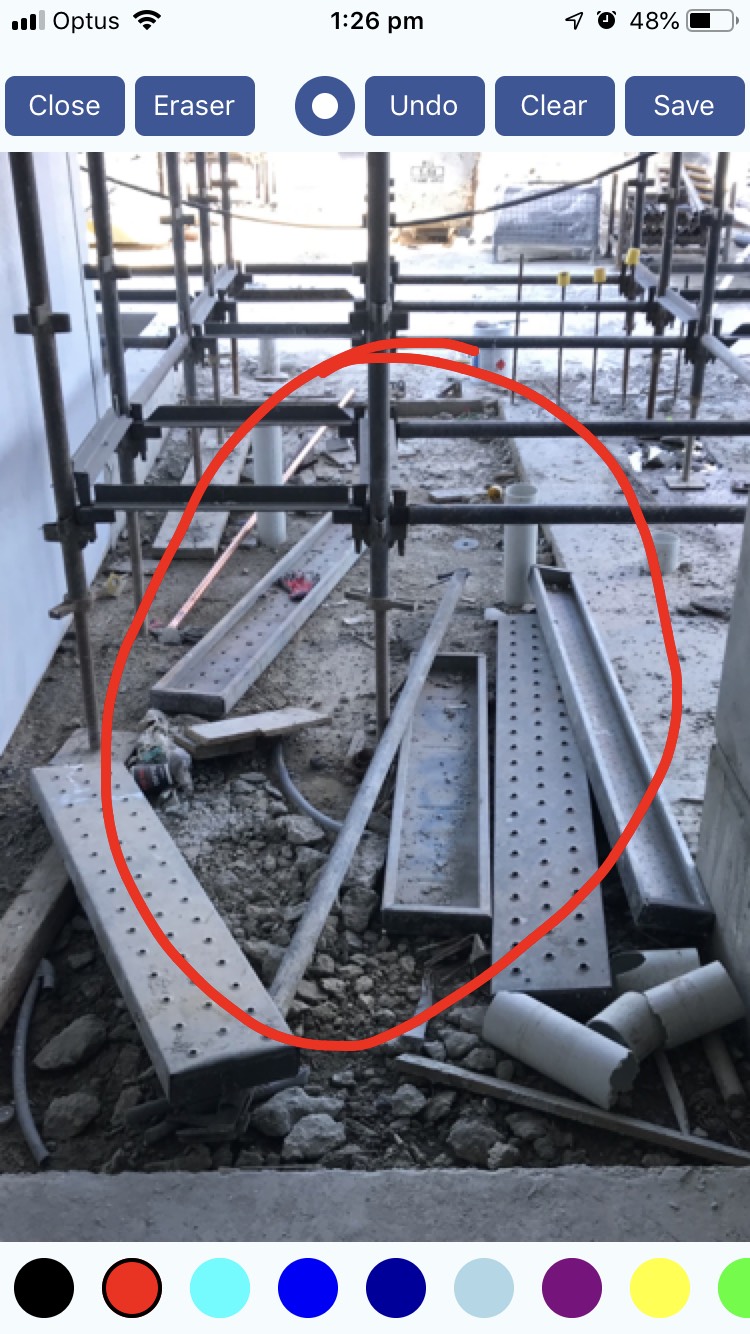
ii. Click on Save.
4. Click on Back to return to the main form.
-
Continue to add additional actions or photos to your form, as required.
-
Once ready, you can complete the form. You will have either 2 or 3 options depending on how the form’s been created:
Delete Photo
If you need to delete any photos from the form:
- Click on the Edit button to select the photos you wish to delete.
- On the image, click on the blue circle to mark it for deletion.
- Click on the Delete button to delete the photo. You will be shown a confirmation dialog.
- Click on Ok to delete the photo. The photo will be deleted, and you’ll be returned to the media page.
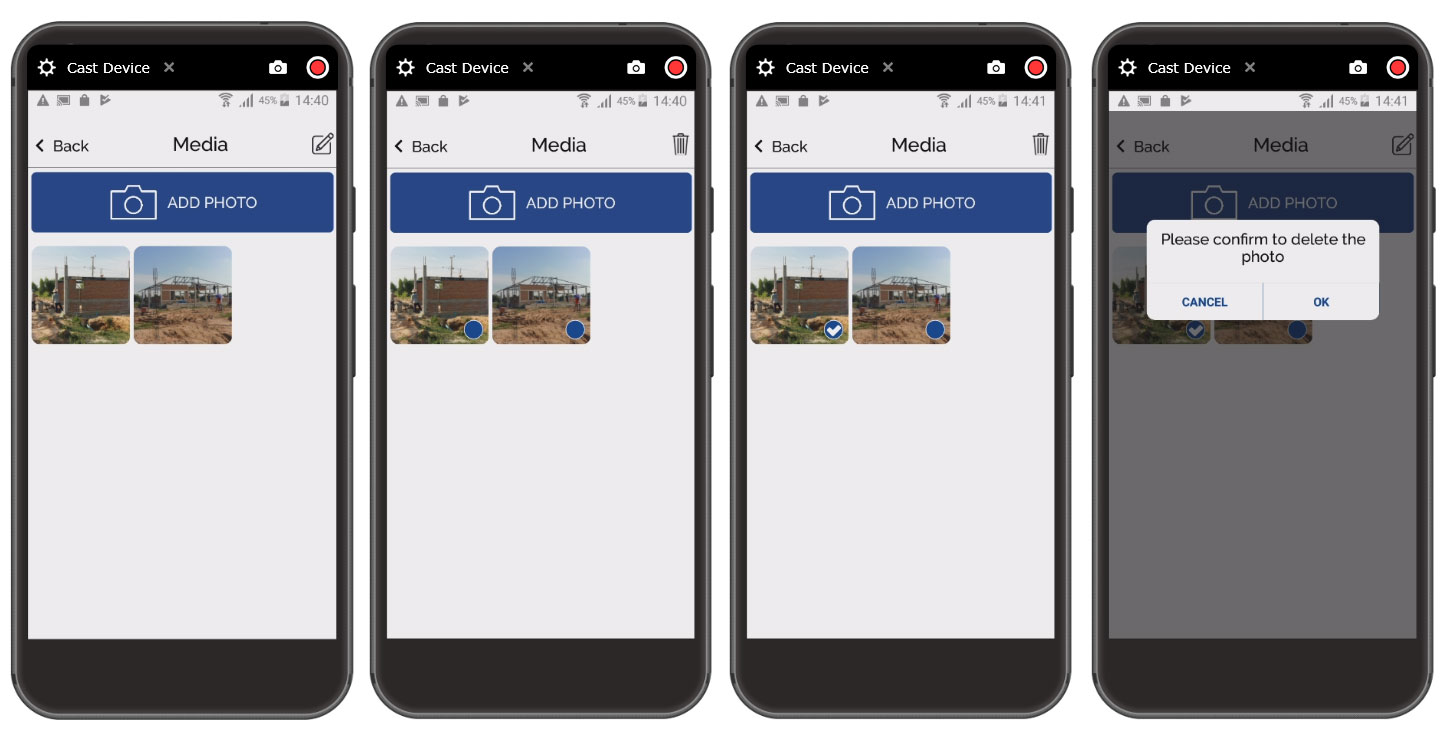
To delete a photo, click on the edit button, select the photo(s) to delete, then click on delete and then confirm.
- Click on Back to return to the task page and then continue to edit your task.
Sign-off
- Sign – the sign button won’t be present in every form. If it is present, then enter your name prior to signing the form. You will then be presented with the signature box where you can sign your name:
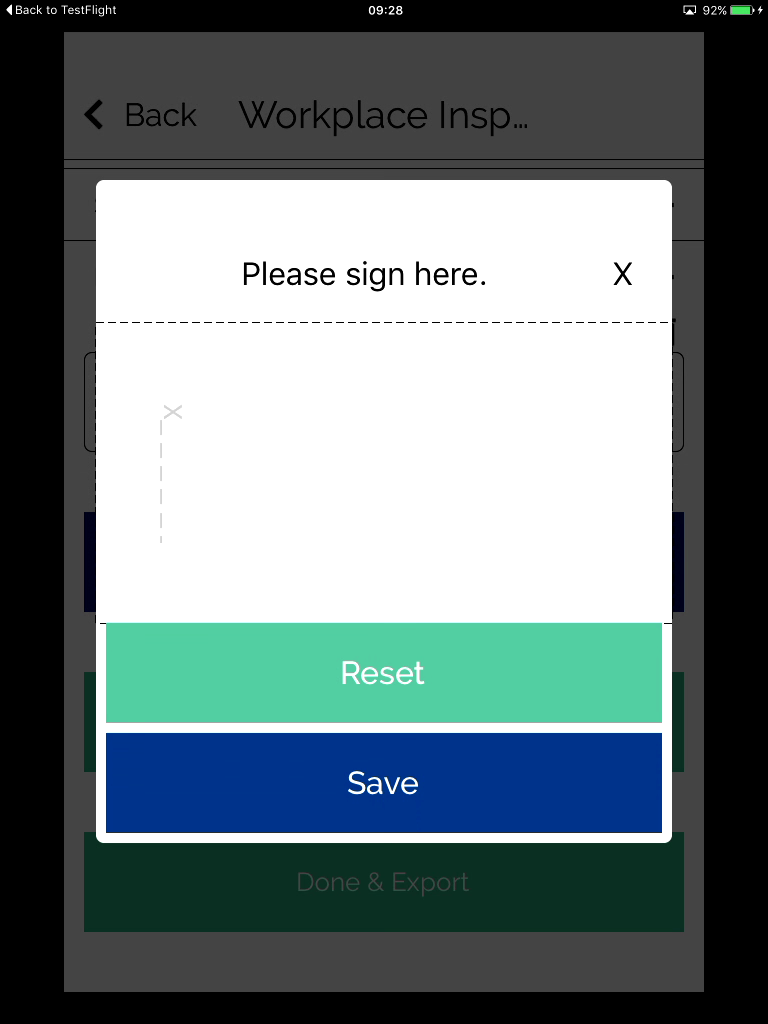
The sign box will only be available if it's been created as part of the form itself. If there isn't one, then this option will be unavailable.
Once done, click on Save to close the dialog. You will then be returned to the form.
Completing the form
Once you've filled out the form, you will have the following 2 options:
- Done
- Done & export
Done
When you click on Done, the form will save, close, and be moved to the Completed Records area of the app. This form can still be edited (refer to Edit the Record).
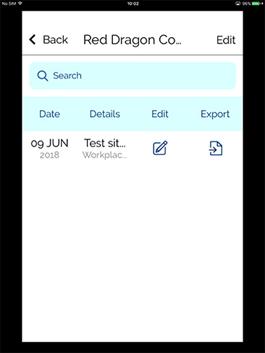
Your task will now get added to the main list and be ready for export
Done & Export
Clicking on Done & Export will take you through the export a form procedure. Click here to go to Export a Form
Updated almost 5 years ago
