App Fields
App Fields
All fields that you create in the App Management section are added to the App fields library.
This can be accessed either through:
- The Add Field From Library button in the app forms section (this function opens as a pop-up)
- Clicking on the App Fields tab from the App Forms page.
The following will display:

The App Form Fields Management grid
Here you can see the field ID, Name, Type, Status and Action. From here, you can:
- Add New App Form Field (we covered this earlier)
- View an App field
- Edit an App field
- Delete an App field
- Search for an App field
- Export App fields
- Print App fields
View an App Field
To view an app field:
- Identify the field whose attributes you wish to view.
- Click on the field name to open it and view its attributes.
This is in view mode, so no attributes can be modified.
Edit an App Field
To edit a form field:
- In the Action column, click on the Edit button to open the form field for editing.
- The form will open, and you can edit all attributes except the field type. Refer to Add New Form Field for further information.
- Click on one of the Save buttons once all changes are made.
Delete an App Field
To delete a form field:
- Identify the record that you wish to delete.
- In the Action column, click on the Delete button and the confirmation dialog asking you to confirm that you wish to delete the field will display.
- Click on Yes to delete the field.
Search for an App Field
You can use the search field to quickly locate an app field. This is useful when the number of fields exceeds the grid size, perhaps running into dozens of pages.
-
Click in the search field and start entering your search term.
-
If we enter ‘temperature', as soon as you type ‘tem’ the filter has isolated the record you need:

Using the search functionality will help you quickly locate the items you need
Export App Fields
You can also export the grid in either the csv or the xlsx format:
- If you want to export the entire grid, ensure that no search filter is in place (delete the search text to clear the search). If a search filter is in operation, only the filtered results will be saved to the downloadable file.
- To export as csv, click on the csv button and the Save As dialog will open to allow you to save the file to your computer
- To export as an Excel spreadsheet, click on the Excel button. Again, the Save As dialog will display and allow you to save the file to your pc.
- You can now open the file in the normal manner.
Print App Fields
You can also send the grid, filtered or unfiltered, to the printer:
-
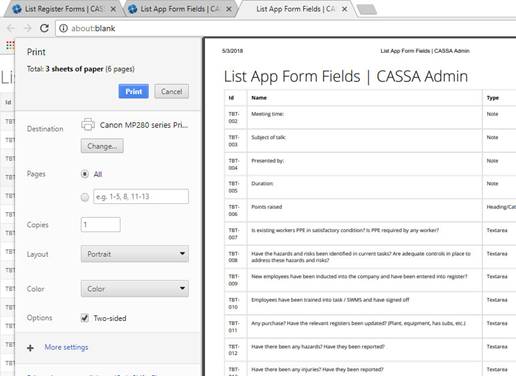
Click on Print and the print window will open.
-
You can now change print settings, such as Destination printer, the number of pages, page orientation, etc. The actual settings all depends on your own printer.

The print preview function. What you see may differ to this (depending on your printer)
- When ready, click on the Print button to send it to your printer.
Updated almost 5 years ago
