Company Registration
Registering as a company with CASSA follows the same process as that of registering an employee, but with 2 extra steps:
Note: even though you register as a company, you will still need to complete your own profile. This comes under the umbrella of Employee Training but is applicable for all CASSA members.
Step 1 – Register
The first step is to register your own details.
- Enter your first name, email address and password into the respective fields (not forgetting to confirm your password, of course).
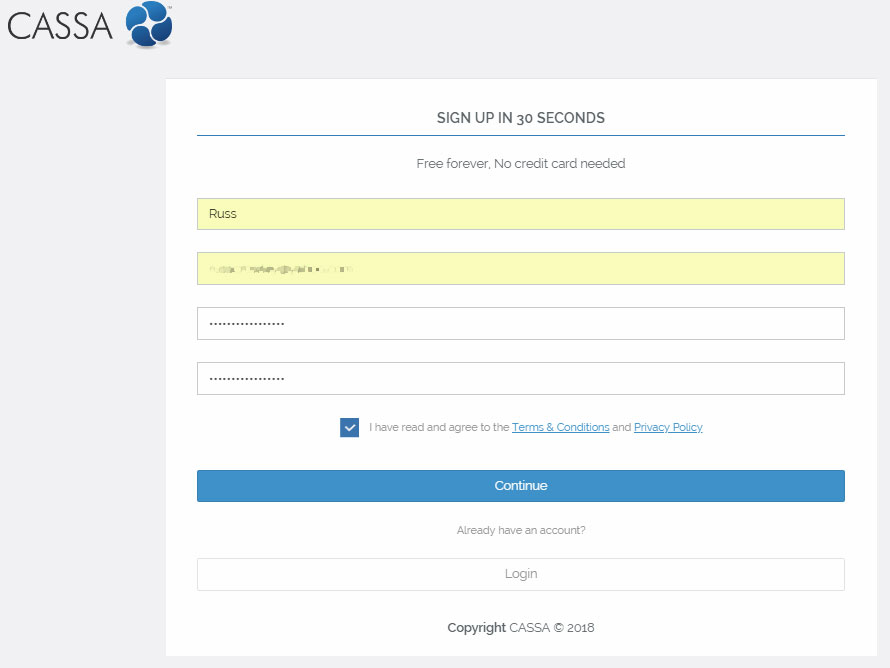
Register your details
-
Click on the Terms & Conditions and the Privacy Policy links and read both of these. You must confirm that you’ve read, understand, and agree to them to create an account. Once done, and you’re ready to proceed, check the box which says you’ve both read and agree to both.
-
Click on the Continue button. The page will refresh, and you’ll be taken to the next step of the registration process.
Note: you need to verify your email address before you can access the full, free functionality of the CASSA system. When you click on the Continue button, the email will be sent to your registered address.
Step 2 – Email Verification
Though you don’t necessarily have to do this at this stage, you will need to confirm your email address to access CASSA’s full capabilities. Until you do so, you can only populate your personal profile and perform limited tasks, so we’d recommend checking your email and verifying as soon as you can.
When the email does come through, click on the lVerify Email link to confirm:
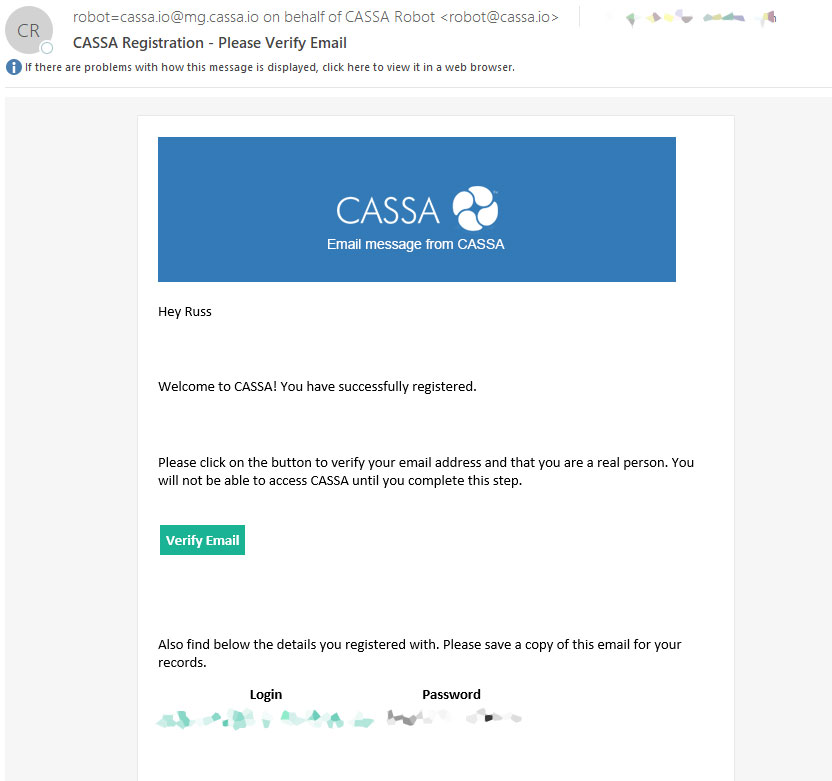
You must confirm your email
That’s it.
You will receive a You have successfully verified your email message. If you’ve completed registration, then you’ll be redirected to the CASSA site; if you haven’t, then you’ll need to go onto step 3.
Step 3 – Company Account
Now you will register your company account.
- Leave the I require a free company account checked and then enter your company details: company name, address, city, state, Zip code, and country.
Note: You cannot change your company name once you leave this screen, so please check to make sure it’s correct before proceeding.
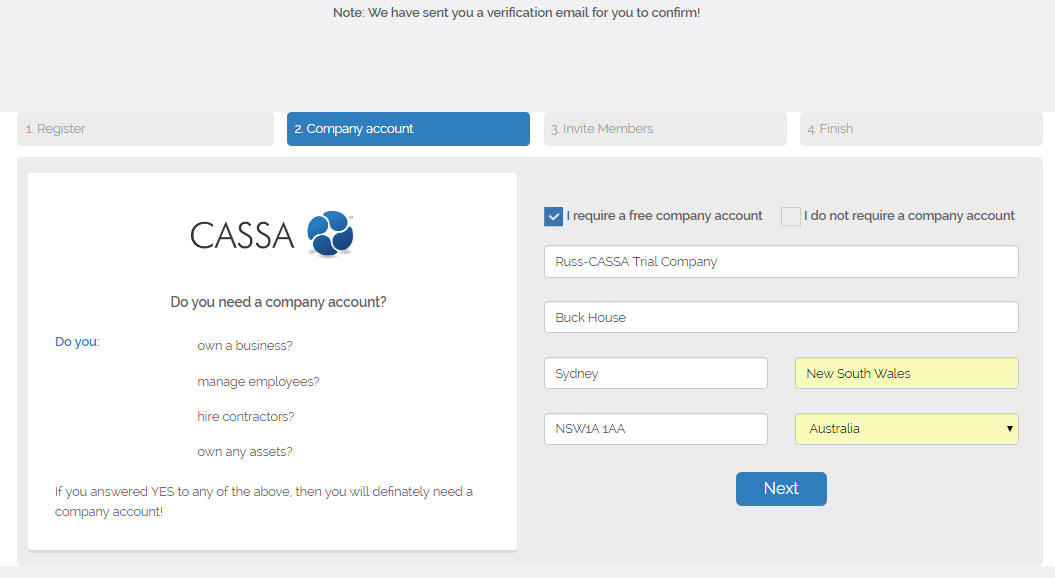
Setup your company account
- Click on Next.
Step 4 – Invite Members
Now it’s time to invite your team members.
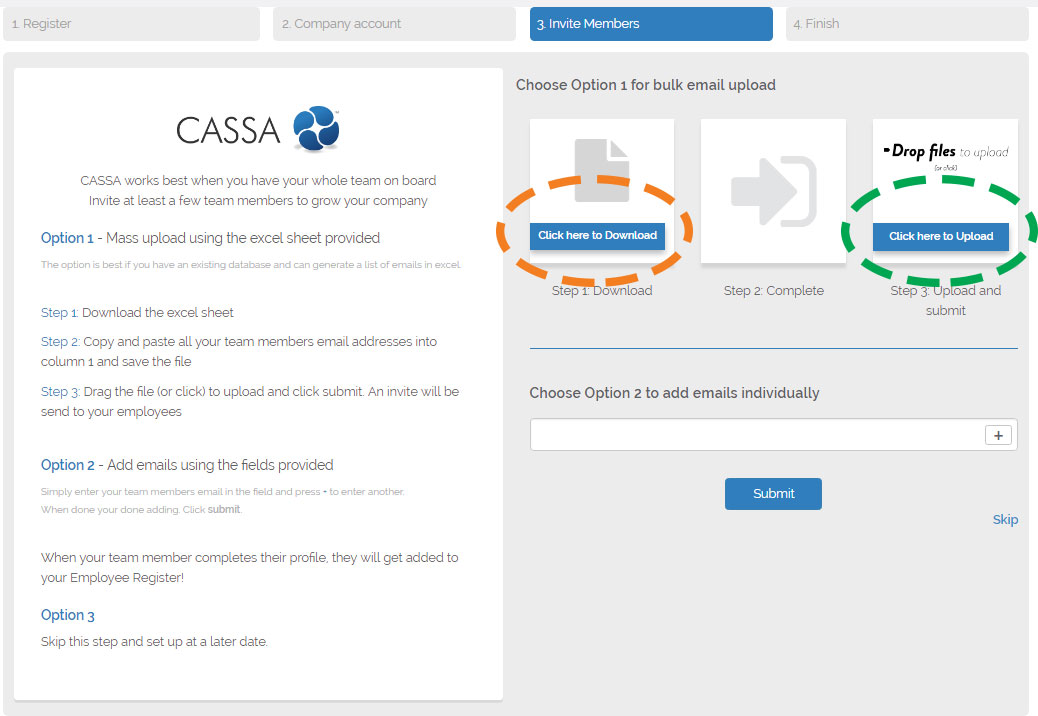
Invite your team members
There are 3 ways in which you can invite members:
- Option 1 is to upload a spreadsheet containing all their email addresses
- Option 2 is to add their email addresses manually
- Option 3 is to skip this step and add them later.
Either method works, but assuming you don’t want to skip this step (if you do, then go to Step 5 – Finish) the easiest and quickest way is to download our Excel spreadsheet, add all your team’s email addresses, and then upload it for import into the system.
Option 1 – Mass Upload Using the Excel Sheet Provided
With option 1, the first step is to download the Excel spreadsheet:
-
Click on where it says ‘Click here to download’ (circled in orange on the image above). A new tab will open and the email_invites.xsls file will download to your computer.
-
Open the Excel spreadsheet and you will see the column header ‘Email’ and sample email address in row 2. The below image shows the basic spreadsheet with a header row and 1 sample email:
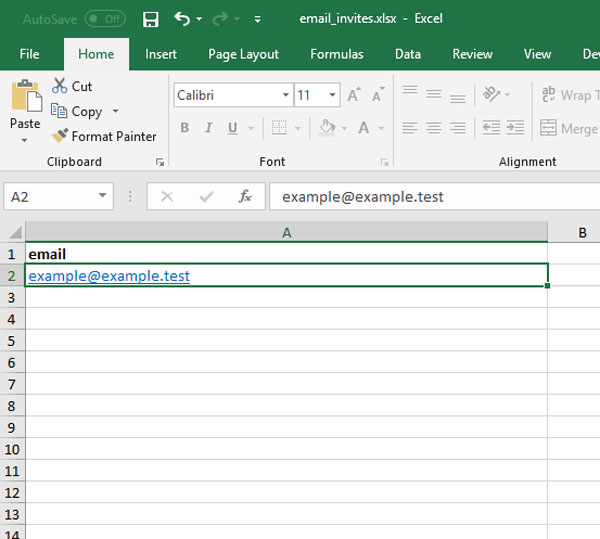
Add the emails to the spreadsheet
-
Add your team member’s email addresses to column A of the spreadsheet – 1 email address per row. You can delete the sample email address once you understand what is required. Do not delete the header row ‘email’.
-
Your spreadsheet should look similar to this (with your own team members’ email addresses, of course):
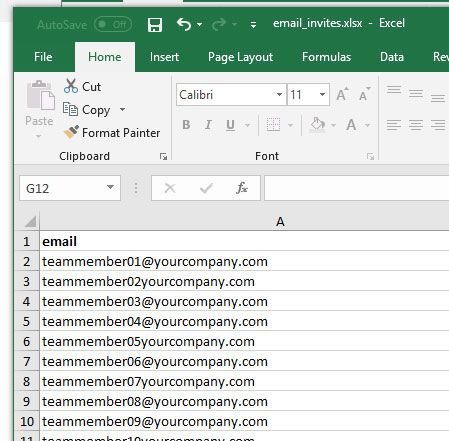
Ensure the email addresses are correct
Important: the above image is for illustrative purposes only.
Your email addresses must be valid and exist for the import to work otherwise our mail provider will block and blacklist the email addresses. If you look closely at the image above, the email addresses in rows 6 and 8 are incorrectly entered and will fail. Ensure all your email addresses are valid.
- Save the spreadsheet to your computer and then upload it to CASSA by clicking on the Drop files section (highlighted green in the first image in this section). The file will upload, the email addresses will be imported, and the invitations emailed out to each addressee.
The invitations look like this:
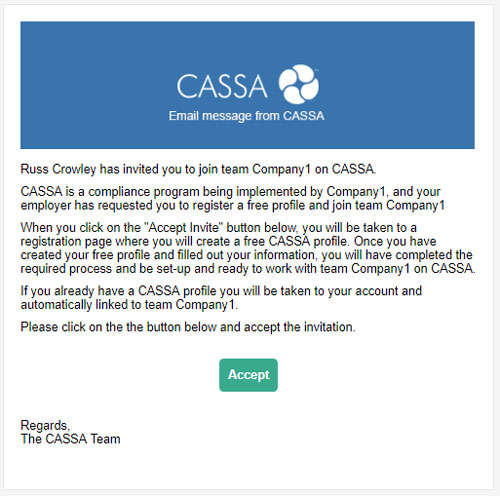
Your email invitation will look similar to this
Once your addressees click on Accept, they will then be taken to the Employee Registration page, where they will register an account.
Option 2 – Add the Email Addresses Individually
Option 2 is for if you only have a few team members or if you prefer to add individuals later on:
- Enter the email address into the field, as shown.
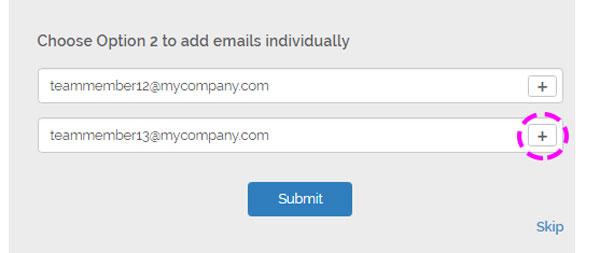
Add email addresses individually
-
Click on the + button to add additional email addresses. Again, as in Option 1, the email addresses must be valid otherwise our mail provider will blacklist them.
-
When finished, click on the Submit button.
Option 3 – Skip
Option 3 is fore when you don’t have your team members’ email addresses to hand, or would prefer to do this later. If so, click on the Skip button and you’ll be taken to step 5.
Step 5 – Finish
When the registration process is complete, you will be automatically taken to the CASSA ‘My Profile’ dashboard where you need to fill in your profile details.
Note: we would always recommend that you fill in your profile, especially the required fields (marked with an *), including: Last Name, City, State/Province/Region, Zip/Postal Code, and Mobile Phone number, before you try and do anything else in CASSA as other company functionality might not be available to you until you’ve done so.
Refer to My Profile in the Company Training.
Updated almost 5 years ago
