User Listing
The User Listing tab displays a full list of all users who’ve been added to your company. It’s a quick way of viewing all those who’ve been added to your company, their details, roles, etc.
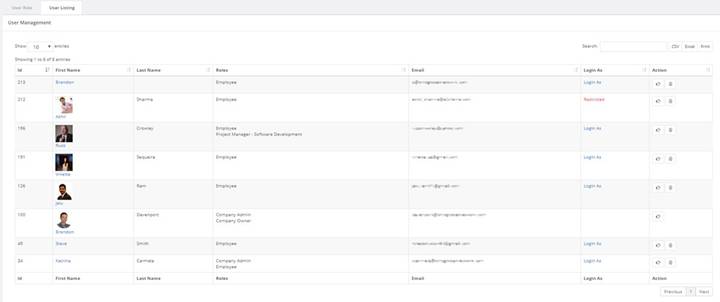
The User Listings grid displays all users who've been added to your company
As you can see from the image above, you can view their user ID, First Name, Last Name, Roles, Email address, Login As, and Actions. We’ll look at these in more detail now.
- ID, Last Name, and Email addresses are self-explanatory.
- First Name – this field, as well as listing their registered first name, is also a link to view their CASSA profile. Click on it to view their profile (you might want to right-click and select Open in new tab, rather than lose your place).
- Roles – this is an at-a-glance look at what roles they’ve been assigned.
- Login As – clicking here allows you to login to this user’s profile. If you recall, you set this in Login As Privacy Settings, here. If you turn this setting off, as Akhil has done in the image above, then the red Restricted text will show, and you will be unable to login as them.
- Actions – the available actions will be determined by your access and user credentials. At present, the image above shows the Assign Role and Delete buttons.
You can carry out the following tasks here:
View User
If you wish to view one of your employee’s profiles:
- Click on the hyperlinked First name.
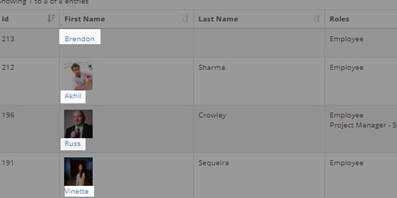
The user's first name is hyperlinked
- You can then view their profile.
Privacy Settings
If their Privacy settings (refer to My Profile > Privacy Settings - link here) have been configured to allow you to view their details, then you will be able to view their profile; if not, then you will see the following message:
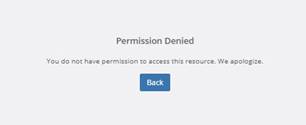
Permission denied (based on the user's privacy settings)
(Hint: when viewing user profiles, you might want to right-click on the link and select Open in a new tab, otherwise you’ll be hitting the back button to come back to the grid each time.)
Login As
The Login As feature allows you to view the CASSA system as the user/employee themselves.
This is useful for:
- when you’ve assigned/re-assigned roles and want to ensure that the user can access exactly what they need to, and
- when your designated admin assistant needs to update employee information.
However, and as mentioned in View User, above, this functionality is tied directly into the user’s privacy settings (My Profile > Privacy Settings > Login As Privacy Settings)
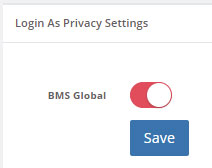
This toggles permits/denies the Login As privacy Setting
As such, if they have not granted your company access to this Login As feature, then you will be unable to perform this function.
If you do not have permission, the following Restricted notification will display in the grid:

If permission has been granted:
- Identify the user whose profile you wish to view
- Click on Login As (or right-click and select Open in New Tab) and you will go to the user’s profile and will see the following:
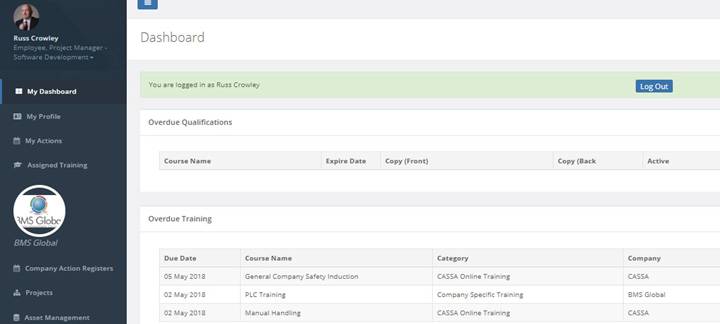
Viewing the user's profile
-
As you can see, the green bar informs you that you’re logged in as the user. You can also see the Log Out button. You must log out when you’ve finished with your user’s profile.
-
You can now carry out the required admin tasks for this user.
Your Rights When 'Logged In As'
You can only add qualifications and similar items, you cannot edit/change or delete any information.
- When complete, click on the Log Out button to return to your own profile.
Assign Role
As the action suggests, this is where you can assign or reassign roles within your company to your team.
- Select or deselect the roles required.
- By default, the Active checkbox is selected. This means that the assignment will take place as soon as changes are made. If you wish to make this user inactive, deselect the checkbox.
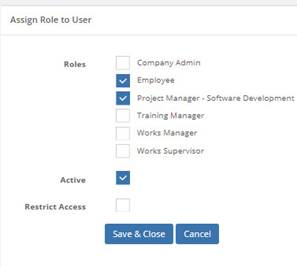
Here's where you assign/unassign user roles
- The Restrict Access feature is used for periods where employees and/or sub-contractors are no longer actively working for you, but you don’t want to remove them from your company. This is useful for time-off such as vacations and other legitimate absences from work; or, when you know you won’t need a sub-contractor or an employee who comes and goes for a month or two, that kind of thing.
Note: this is a completely different setting to Active/Inactive. Active/Inactive determines whether the user will receive system notifications and whether or not inactive qualifications and the like will show.
- Once all changes have been made here, click on the Save & Close button to save all changes and return to the List Users screen, or click on Cancel to discard all changes and close this dialog.
Delete User
To delete a user:
- In the grid, identify the user that you wish to delete (you can also use the search facility to help you locate a particular record).
- Click on the Delete button.
- The confirmation dialog will display asking you to confirm that you wish to delete the user.
- Click on Yes, the dialog will close, the screen will refresh, the user will be deleted, and they will be unlinked from the company.
Search for a User
The Search field acts as a filter for whatever part of the CASSA system you’re in, such as assigned courses, registers, forms, users, etc. To use it:
- Enter a keyword into the field and, as you type, the results will filter accordingly.
Note: you don’t just have to search on a person’s name, you can also search based on other column entries. For example, if you start to enter ‘admin, as soon as you started typing ‘ad', you will already see the results you need:

Searching for a user
- To initiate an action, identify the record you require and click on the required button, e.g. View, Edit, Delete, etc. You can also use this filter records for export or print.
Note: this search functionality is used throughout the CASSA system and we encourage you to use it to your advantage. However, different actions will become available for different tasks based on user access, permissions, etc.
Export User Details
You can also export the user management grid in either the csv or the xlsx format:
- If you want to export the entire set of records, ensure that no search filter is in place (delete the text from the search field to do this). If a search filter is in place, then only the filtered results will be saved to the downloadable file.
- To export as csv, click on the csv button and the Save As dialog will open to allow you to save the file to your computer
- To export as an Excel spreadsheet, click on the Excel button. Again, the Save As dialog will display and allow you to save the file to your pc.
- You can now open the file on your computer and view it in the normal manner.
Print User Details
You can also send the user management grid, filtered or unfiltered (as before), to a printer
-
Click on Print and the print window will open.
-
You can now change print settings, such as Destination printer, the number of pages, page orientation, etc. The actual settings all depends on your own printer.
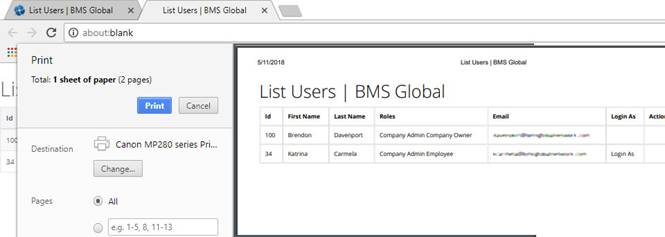
The print preview function. What you see may differ to this (depending on your printer)
- When ready, click on the Print button to send it to your printer.
Updated almost 5 years ago
