Main Menu
The main menu in the CASSA app is accessible by clicking on the ‘hamburger’ button on the Home screen:
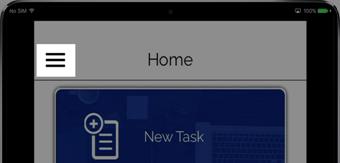
The 'Hamburger' main menu button
You’ll be taken to the main menu where you will see the following menu items:
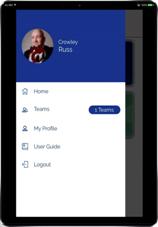
You sub-menu items
Click on the link you require, and you’ll be taken to that particular screen.
Home
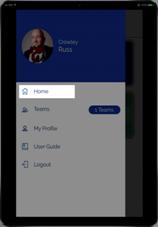
If you ever need to return to the Home screen, click on the hamburger icon from anywhere in the app and the main menu will appear. Click on Home to go back to the main screen.
Teams
You can have multiple teams in CASSA, and they will be listed here.
- Click on Teams to expand the list and you can then select the required team:
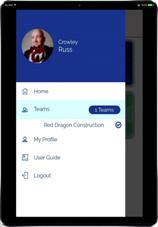
As you can see from the image above, I only have the 1 team in my account, so that’s all that I can select.
My Profile
The My Profile section enables you to modify elements of your profile in the same way as the main app.
When My Profile is first displayed, you will see the following:
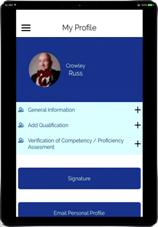
Here you can:
- Setup the General Information (your General information is where you manage your name, address, and other personal information).
- Add Qualification
- Add Verification of Competency / Proficiency Assessment
- Add Signature
- Email Personal Profile
If it’s your first time using the app, we’d recommend that you start with General Information.
General Information
To access General Information:
- Click on the plus (+) button next to General Information and the section will expand:
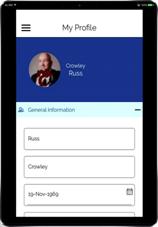
Your general information section
- Here you can add or modify your name, address, and date of birth. The DOB field is a calendar field. Clicking on it will display a calendar from which you can make your selection:
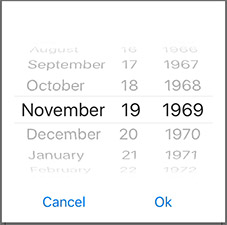
This is a standard date field in the CASSA app
- Once done, click on Ok to add the date. You can now scroll down to view and complete the other fields:gender, email address, address, postcode, country, telephone number, and any specific country-based (or other) fields, such as the Unique Student Identifier (UIS) Number for those in Australia.
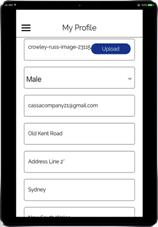
Keep scrolling down to see your additional information
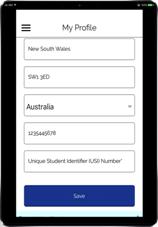
Almost there...
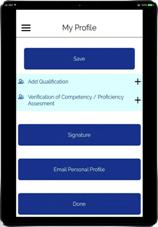
And here's where you can sign-off and save your information
- Most of the fields are simple text entry fields, but you can also upload an image of yourself to use on your profile. To do this, click on the Upload button and you will see a request to access your photos:
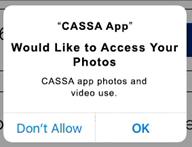
- Click on Ok to allow it access.
- You can now select a photo to upload as your profile picture.
- Once you’ve completed your additions/changes, click on the Save Your profile button will save, and the Success dialog box will display.
Add Qualification
To add a qualification:
- Click on the plus (+) button next to Add Qualification and the section will expand:
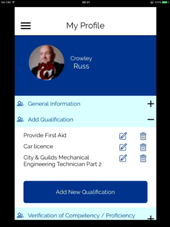
- Here you can carry out the following:
Let’s add a new qualification.
Add New Qualification
To add a new qualification:
- Click on the Add New Qualification button and the Add New Qualification screen will display:
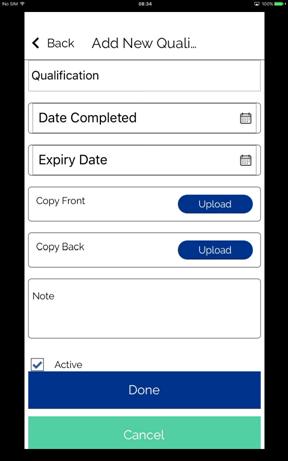
As you can see, here you add the following (you may need to scroll down):
- Qualification name – enter the qualification name exactly how it is on your award/certificate. As you begin typing, the database will see if it can match your qualification.
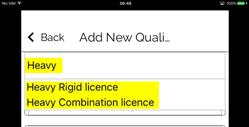
If it does match, select the item; if it doesn’t match, enter it in as normal text.
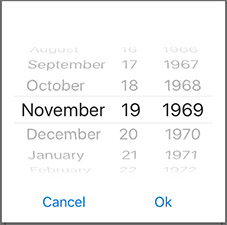
- Date Completed – the completion date from the certificate. This is a date field, and functions as shown here:
- Expiry Date – if there is an expiry date for this certificate then enter it here
- Copy Front – here you can upload a scan, screenshot, or even photo of your certificate. This function will request to access the photos on your device. Permit it to do so and then you can select from your available images.
- Copy Back – you can do likewise with the back of the certificate
- Note – enter any additional notes or comments here
- Active – by default, all qualifications are marked as Active.

This means that it will be available and viewed within CASSA. If the expiry date has not passed, the qualification will be marked as 'Current':

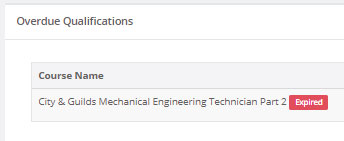
When the expiry date passes, it will be changed to 'Expired’:
- When all details have been added, click on the Done button and the Alert notification will display once the qualification has saved.
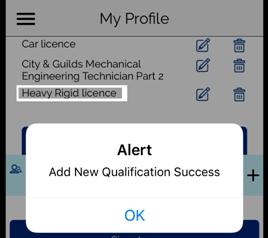
- Click on Ok to close the notification and return to the My Profile screen.
Edit a qualification
To edit a qualification:
-
Identify the qualification you want to edit.
-
Click on the Edit icon:
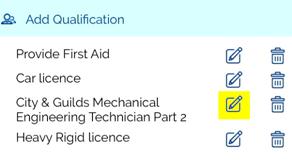
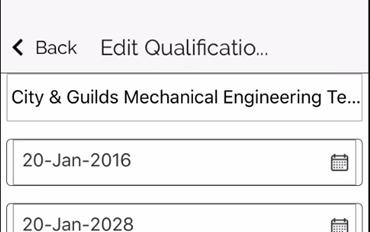
- The record will then open in Edit mode:
-
You can now edit all fields.
-
When complete, click on Done and the Update Qualification Success Alert notification will display:
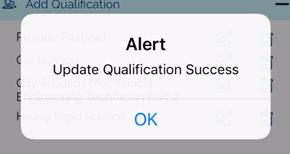
- Click on Ok to return to the My Profile
Delete a qualification
To delete a qualification:
-
Identify the qualification you want to edit.
-
Click on the Delete icon:
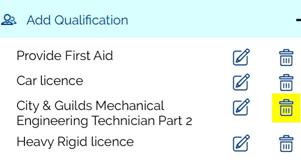
- The delete confirmation notification will display:
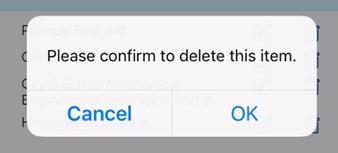
-
Click on Ok to delete the qualification.
-
The screen will refresh, and the record will be deleted.
Add Verification of Competency / Proficiency Assessment
Adding a Verification of Competency / Proficiency Assessment follows the exact same procedure that adding a qualification does. Refer to Add New Qualification.
Add Signature
Your signature will be used throughout the CASSA system and we can take advantage of your device's write-capability to add yours (if you do this on the pc, we recommend you add a png image of your signature).
Use a PNG with a transparent background for your signature
The png format supports a transparent background: if your signature has a white background and appears on anything but a white ‘page’, it’ll look terrible.
To add a signature:
- Click on the Signature button and the signature box will appear:
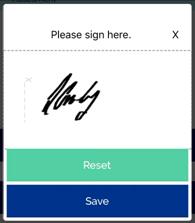
-
Sign in the shown area. If you mess it up, click on the Reset button to clear the box and try again.
-
Once your signature is how you want it, click on Save to return to the My Profile screen.
Email Personal Profile
If you ever need to send a copy of your personal profile to anyone, to easily supply details of your accomplished training and qualifications, or to satisfy any company induction requirements, that kind of thing, then you can do so from within your profile.
Given that you can add all your details, your qualifications, VOC, assessments, company training, other training, etc., your CASSA profile works like an online cv: it records all of what you’ve done, when, and so on. This will not only work for you when our Job Match feature is launched but also saves you a huge amount of time compiling all the information and sending it off. Your profile is sent as a zip file.
To email your personal profile:
- Click on the Email Personal Profile button and a snapshot of your profile will display:
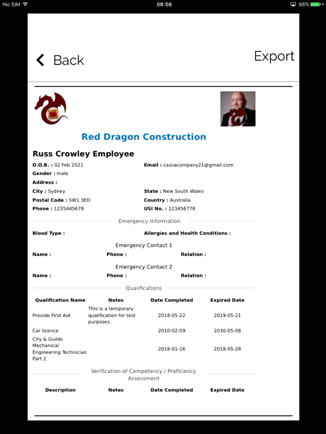
-
Click on the Export link and a dropdown will appear.
-
Here you can either export your profile to Dropbox or send it via Email. Select the option you require:
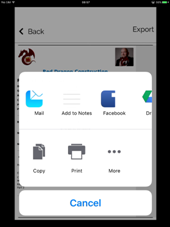
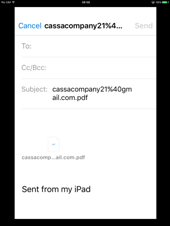
- The functionality for both selections is specific for your device, i.e., adding to Dropbox will save it as a file to your Dropbox folder, and emailing it will send it as a zip file to your selected recipients.
User Guide
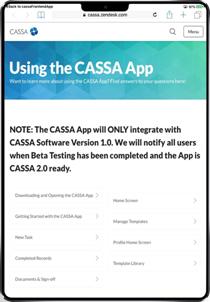
The User Guide will be accessible within the application from this link.
Logout
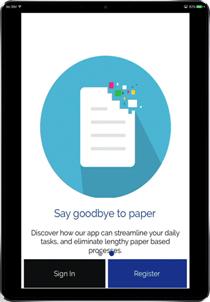
Clicking on the logout button will instantly log you out of the application and take you to the login/registration page.
Updated almost 5 years ago
