Close-out client assigned Actions
Close out Assigned Actions via the CASSA.io Website
To Close Out your contractor reporting requirements and update the status you will then need to do this via the website:
- Click on Projects in the main menu, then Client Projects and then on the project you wish to work in. For the purposes of this example, we’ll be using Pittsburg National Trade Centre:

Identify the project you want to close out
- Click on the View Project button and then on Actions > Scheduled Actions:
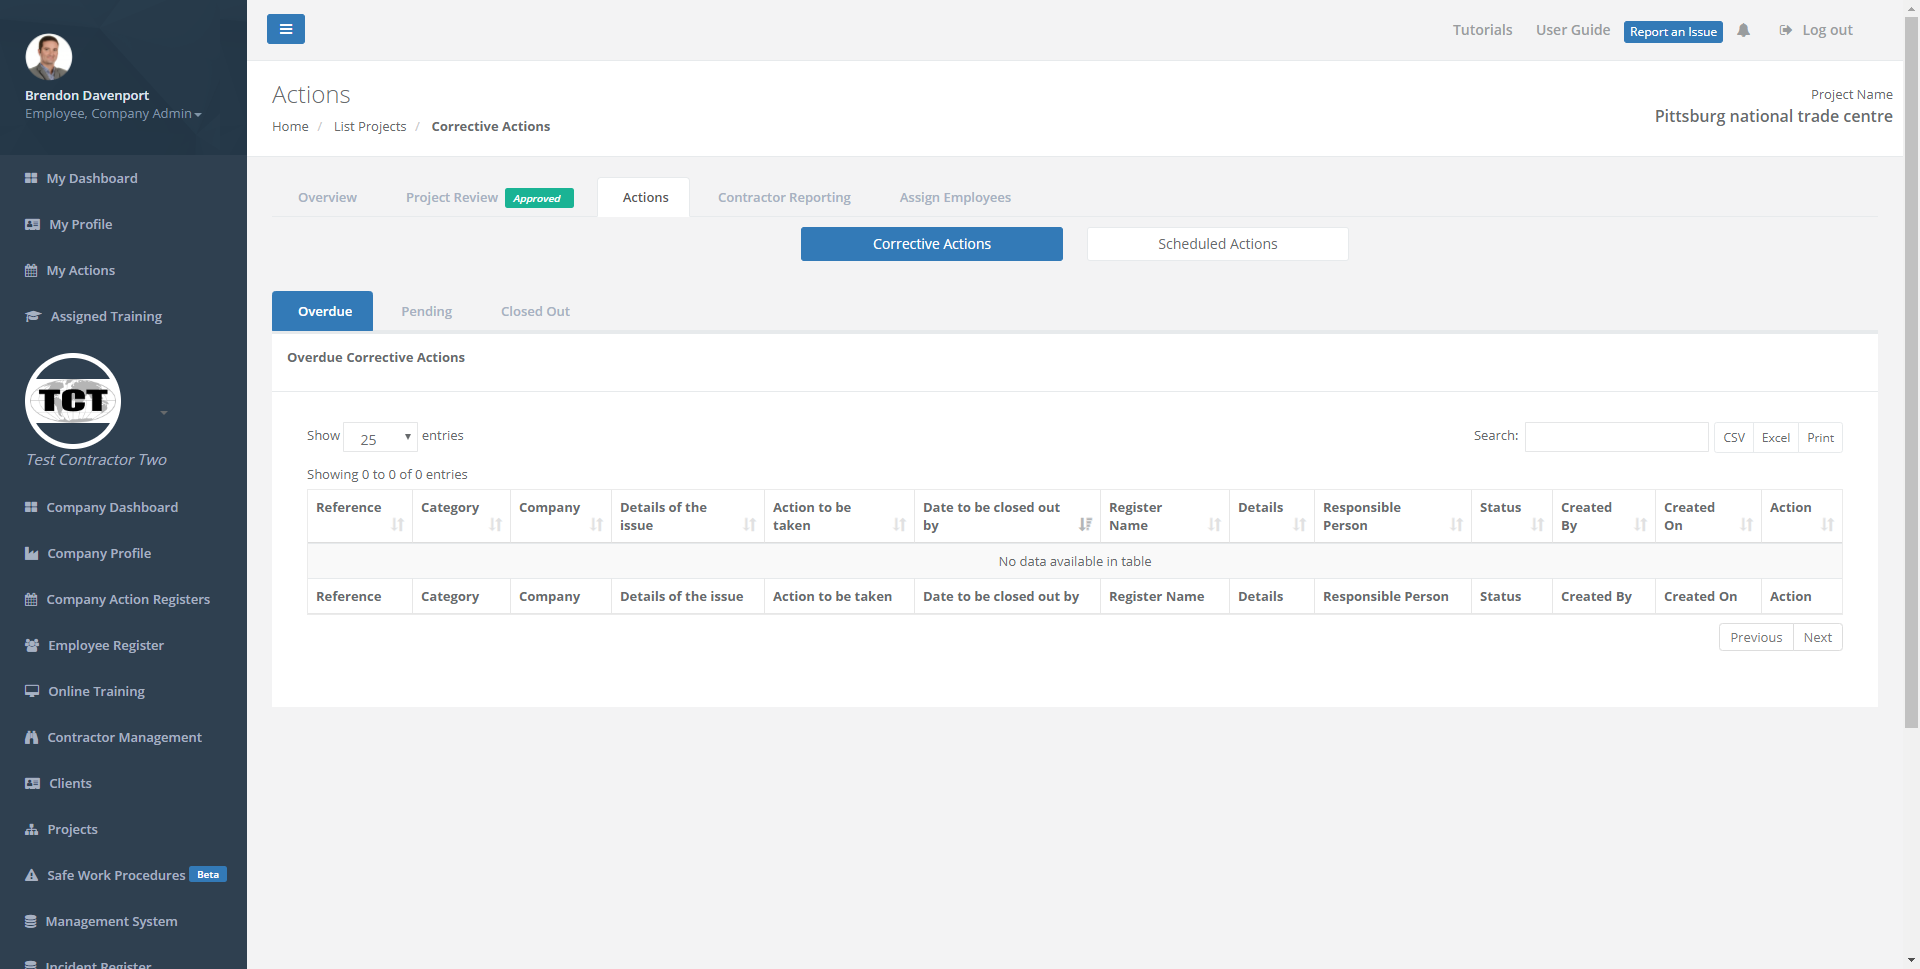
Here you select the type of action to close out
- Click on Up and Coming to see the assigned reporting requirements that are forthcoming. Select the relevant item you wish to close out and then click on the respective Close Out button:
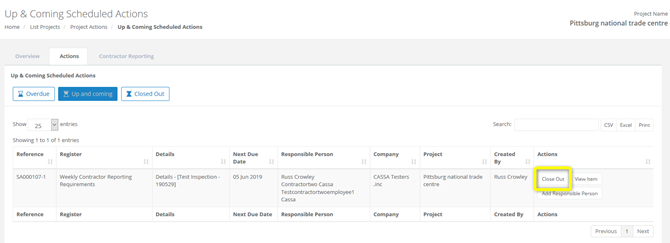
You can see the action details and then select 'Close Out'
- In the Up and coming tab, you can see the information you need to provide:
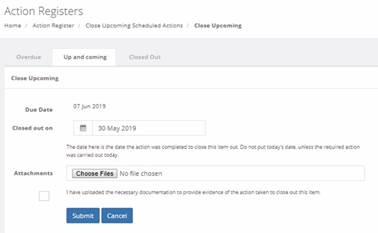
Add the required info to close this action
- Select the Closed out on date.
- Upload any attachments via the Choose Files button.
(This is an alternative way to upload a completed form, if for any reason it is unable to be completed on the CASSA app) - When ready to submit the form click on the Submit button. The form will close and you will be notified that the action was closed successfully.
Add Responsible Person
You may need to assign the items to other employees to complete.
New employees will need to be assigned to the reporting item to see it on the CASSA app.
Assigning users to the project
Users need to be assigned to the project or they will not show up when Adding a Responsible Person as per the below process.
- Click on the Add Responsible Person button to re-assign this responsibility. You’ll see the Re-assign Actions form:
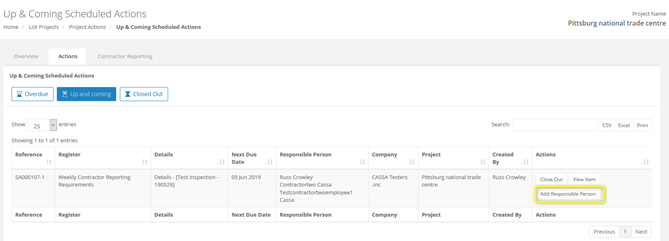
Add responsible person (step 1)
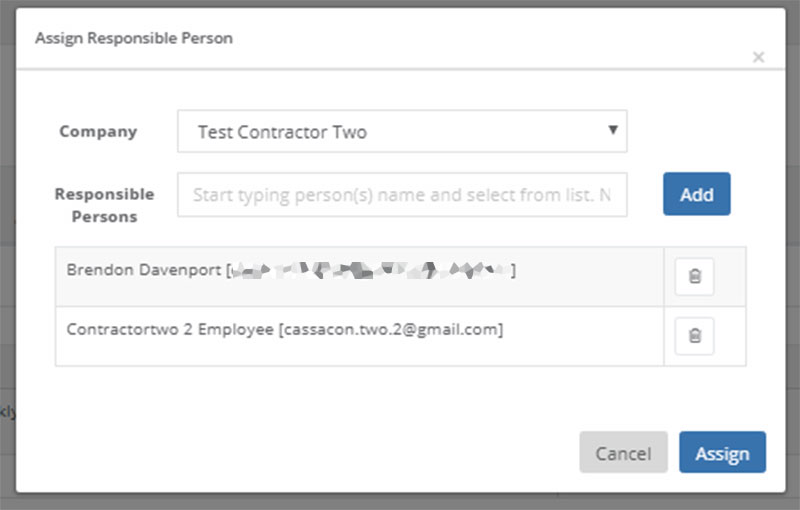
Assign responsible persons
- Click in the Responsible Persons field, start typing and then select the name of the person(s) to whom you wish to assign this action. You can assign multiple names:
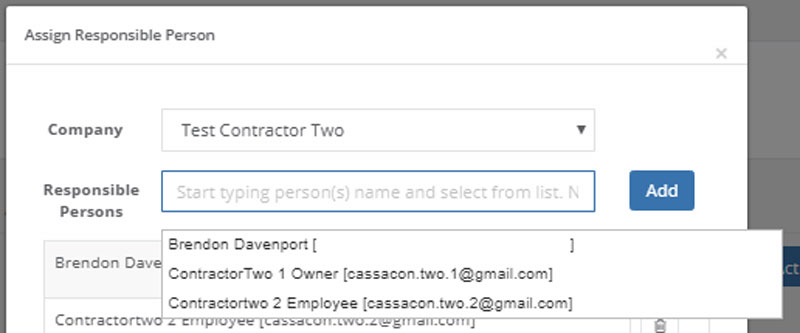
Assigning names
- Click on Add when finished.
Updated almost 5 years ago
